Image via Wikipedia
Since our new control panel works a bit differently from its predecessor I will be trying to post short tutorials on various aspects of it over the coming weeks and months – sorry for not having done more recently!
Today we’ll have a very quick look at managing MySQL databases from the control panel.
When you login to your hosting account you should be presented with a screen similar to this one:
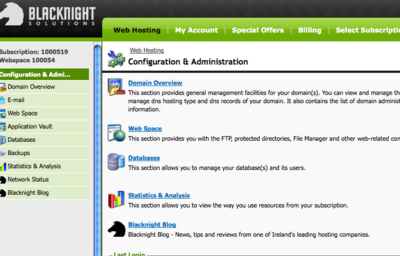
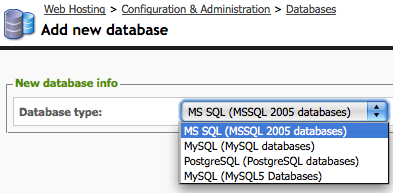
Once you’re able to see the screen shown above you can select the “Databases” option to manage your existing databases OR to create new ones.
Bear in mind that we offer several database engines on our new system so please be sure that you create the correct type!
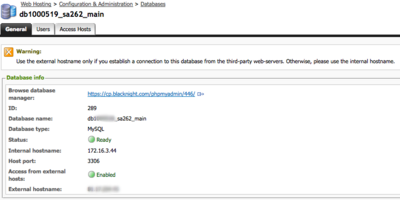
Once you’ve created your databases you can easily manage them via the control panel system (click to enlarge image):

here you can see the database server details that you will need to access your database either from a remote server or from one of our webservers.
NB: you should only use the external IP address if you are accessing the database from a 3rd party provider. If your site is hosted with ourselves please use the internal hostname.
You can also manage users and access hosts from the same area.
So there you go .. some really basic notes on MySQL management on the new control panel
If there are specific things that you’d like us to cover do let us know!

![Reblog this post [with Zemanta]](http://img.zemanta.com/reblog_e.png?x-id=7951b863-a0fb-4e59-ba82-3be1c40cefcb)

